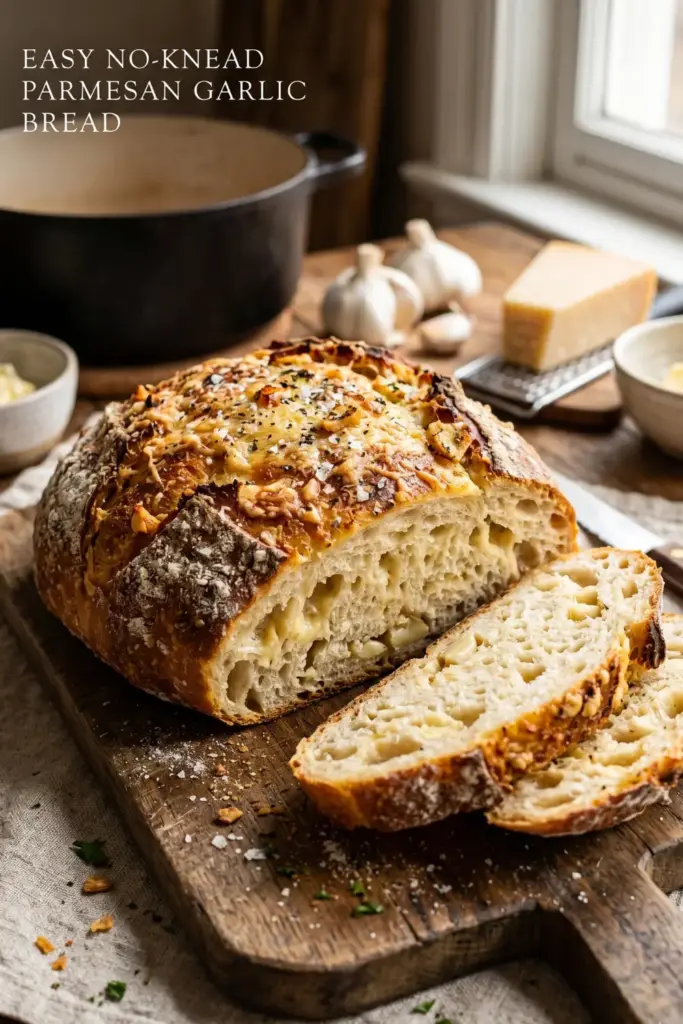
Parmesan Garlic Bread is a rustic, no-knead artisan loaf infused with bold garlic and rich parmesan cheese, baked to golden perfection in a Dutch oven. It requires just six pantry staples and zero kneading, making it accessible even for beginner bakers. The long 12–18 hour rise develops deep, complex flavor that rivals bakery-quality bread. Whether paired with soup, pasta, or a charcuterie board, this bread is a crowd-pleasing staple for effortless feast nights.
What Is Parmesan Garlic Bread and How Do You Make It?
Parmesan Garlic Bread is a no-knead artisan loaf made with flour, parmesan, garlic, yeast, salt, and water. Mix the ingredients, let the dough rise for 12–18 hours, shape it, then bake in a preheated Dutch oven at 450°F for 30–45 minutes until golden and crusty. The result is a shatteringly crisp crust wrapped around a tender, cheesy, garlicky interior — with only 15 minutes of hands-on effort.
Introduction
There is something deeply comforting about the smell of garlic-laced, cheesy bread fresh from the oven. It fills the kitchen with warmth before the first bite is even taken. This Easy Artisan Parmesan Garlic Bread brings together the nutty richness of parmesan and the bold savoriness of garlic inside a loaf with a shattering crust and a pillowy, tender crumb — all without a single minute of kneading.
This recipe was built for real life: minimal effort, maximum reward. With just six ingredients and a long, lazy overnight rise doing all the heavy lifting, you will produce bakery-level bread that looks and tastes like it took far more skill than it actually did.
Why You’ll Love This Recipe
- Zero kneading required — the long rise does all the work for you
- Only 6 ingredients — all pantry staples you likely already own
- Deeply flavorful — the 12–18 hour fermentation builds complex, rich taste
- Stunning crust — the Dutch oven method produces a bakery-worthy crunch
- Endlessly versatile — pair it with soups, salads, pasta, or a charcuterie board
- Easily customizable — swap cheeses, add herbs, or dial up the garlic
- Make-ahead friendly — prep the dough up to 24 hours in advance
Key Ingredients
| Ingredient | Purpose | Substitutes |
|---|---|---|
| All-purpose flour (3 cups) | Provides structure and body | Whole wheat flour for a heartier loaf |
| Parmesan cheese (1 cup, grated) | Adds rich, nutty, cheesy flavor | Asiago or Pecorino Romano |
| Garlic, fresh (3 cloves) | Infuses savory, aromatic depth | Garlic powder if fresh is unavailable |
| Salt (1 tsp) | Enhances flavor, controls yeast | No substitution recommended |
| Yeast (2 tsp) | Leavening agent for rise | Instant yeast preferred (no activation needed) |
| Water (1.5 cups) | Hydrates dough, enables gluten formation | Adjust slightly based on dough consistency |
How to Make Parmesan Garlic Bread
Making the Dough
Step 1 — Combine dry ingredients In a large bowl, whisk together the flour, salt, and grated parmesan. Add the garlic, then sprinkle the yeast evenly over the top.
Step 2 — Add water Gradually pour in the water while stirring with a spatula or wooden spoon. Mix until a shaggy, sticky dough forms. Do not worry if it looks rough — a wet, sticky dough is exactly what you want for a soft, airy interior.
Pro tip: If the dough feels too stiff, add water one tablespoon at a time until it comes together in a sticky mass.
Step 3 — Long rise Cover the bowl tightly with a clean kitchen towel and leave it at room temperature for 12–18 hours. This slow fermentation is the secret to deep, bakery-quality flavor. Do not rush this step.
Step 4 — Shape the dough After the rise, the dough should look bubbly and nearly doubled. Turn it out onto a well-floured surface and, using floured hands, fold it gently into a round ball. Allow it to rest uncovered for 30 minutes to relax the gluten before baking.
Baking the Bread
Step 5 — Preheat the Dutch oven Place a Dutch oven with its lid inside your oven and preheat to 450°F (230°C). The vessel must be screaming hot before the dough goes in — this is what creates the dramatically crispy crust.
Step 6 — Bake Carefully lower the shaped dough into the preheated Dutch oven. Cover with the lid and bake for 30–45 minutes until the crust is deep golden brown.
Pro tip: Remove the lid in the final 10 minutes of baking if you want an even deeper color on the crust.
Step 7 — Cool on a wire rack Remove the bread from the Dutch oven and transfer to a wire rack. Allow it to cool for at least 15–20 minutes before slicing. Cutting too early releases steam and collapses the crumb.
Optional: Brush the top with a little olive oil immediately after baking for extra richness and shine.
Pro Tips
- Don’t skip the long rise. A 12–18 hour fermentation is non-negotiable for flavor. Shorter rises produce blander bread.
- Keep the dough sticky. Resist adding extra flour. A wetter dough produces a lighter, airier crumb.
- Always preheat your Dutch oven. A cold pot will steam the base and ruin the crust. The hot vessel mimics a professional bread oven.
- Use freshly grated parmesan. Pre-grated cheese contains anti-caking agents that diminish melt and flavor. Grate it yourself for best results.
- Test your yeast. If your yeast doesn’t bubble when introduced to warm water (around 110°F), it has expired. Always use fresh yeast.
- Warm, draft-free rising environment. If your kitchen is cold, place the covered bowl in an unheated oven with just the light on.
Variations
| Variation | What to Do |
|---|---|
| Herbed Delight | Fold fresh rosemary or thyme into the dough before the rise |
| Cheesy Surprise | Mix in shredded mozzarella or fontina for an extra-melty pull-apart texture |
| Spicy Kick | Add red pepper flakes or finely chopped jalapeños for heat |
| Nutty Flavor | Replace a portion of all-purpose flour with almond flour for sweetness and nuttiness |
| Mediterranean Twist | Fold in chopped kalamata olives or sun-dried tomatoes |
| Garlic Lover’s Dream | Double the garlic for a punchy, robust loaf |
| Onion Infusion | Add caramelized onions for sweet, savory depth |
| Gluten-Free | Use a certified gluten-free flour blend; adjust water ratio per package instructions |
Serving Suggestions
- Hearty tomato soup — a natural pairing; dip generously
- Fresh garden salad — the crunch of greens contrasts beautifully with the rich bread
- Creamy pasta dishes — alfredo or carbonara alongside this bread is an indulgent combination
- Charcuterie board — slice and serve with cured meats and cheeses for entertaining
- Olive oil and balsamic vinegar — a simple dip that adds a Mediterranean touch
- Garlic butter shrimp — the savory seafood echoes the garlicky notes in the bread
Storage & Meal Prep
Room temperature: Store in a paper bag for up to 1–2 days. Avoid plastic bags — they trap moisture and make the crust soggy.
Refrigerator: Wrap tightly in foil or plastic wrap. Keeps for up to 3 days, though the crust will soften slightly.
Freezer: Wrap slices or the whole loaf in plastic wrap, then seal in a freezer bag. Freeze for up to 3 months with no significant flavor loss.
Reheating: Bake at 350°F (175°C) for 10–15 minutes until warmed through and the crust crisps back up. Do not microwave — it ruins the texture.
Make-ahead tip: Mix the dough up to 24 hours in advance and refrigerate after shaping. Bring to room temperature for 1 hour before baking.
Nutrition (Per Slice)
| Nutrient | Amount |
|---|---|
| Calories | 200 kcal |
| Carbohydrates | 30 g |
| Protein | 6 g |
| Fat | 7 g |
| Saturated Fat | 3 g |
| Polyunsaturated Fat | 0.5 g |
| Monounsaturated Fat | 2 g |
| Cholesterol | 15 mg |
| Sodium | 300 mg |
| Potassium | 100 mg |
| Fiber | 1 g |
| Calcium | 200 mg |
| Iron | 1 mg |
| Vitamin A | 200 IU |
Based on 8 slices per loaf.
Frequently Asked Questions
What type of flour works best for this recipe? All-purpose flour is the ideal choice — it gives the bread the right structure and a tender crumb. For a heartier, denser loaf with more fiber, you can substitute whole wheat flour, which also adds a pleasant nuttiness.
Can I make this bread without a Dutch oven? The Dutch oven is strongly recommended because it traps steam during the first phase of baking, which is what creates the signature crackly crust. If you don’t have one, use a deep oven-safe pot with a lid, or place a pan of water on the oven floor to simulate steam.
Why isn’t my dough rising? Inactive or expired yeast is the most common culprit. Check the expiration date and ensure you are using warm water (around 110°F / 43°C). The dough also needs a warm, draft-free environment — if your kitchen is cold, the rise will be significantly slower.
How do I store leftover Parmesan Garlic Bread? Store at room temperature in a paper bag for 1–2 days. For longer storage, wrap tightly and refrigerate for up to 3 days, or freeze for up to 3 months.
Can I make this recipe gluten-free? Yes. Use a certified gluten-free flour blend in place of all-purpose flour. Note that gluten-free flours absorb liquid differently, so you may need to adjust the water quantity. The final texture will be slightly different but still delicious.
Can I use different cheeses? Absolutely. Parmesan is the classic choice, but Asiago, Pecorino Romano, or a blend of your favorites all work beautifully. Each brings a slightly different flavor profile to the loaf.
Can I shorten the rise time? The 12–18 hour rise is what gives this bread its complex, developed flavor. Shortening it will produce a blander result. If time is limited, a minimum of 8 hours will still work, but the full overnight rise is strongly recommended for best results.
Recipe Card
Ultimate Parmesan Garlic Bread Easy no-knead artisan bread with garlic and parmesan
| Prep Time | 15 minutes |
| Rise Time | 12 hours |
| Cook Time | 45 minutes |
| Total Time | 13 hours |
| Servings | 8 slices |
| Cuisine | Italian |
| Course | Baking / Side Dish |
| Calories | ~200 kcal per slice |
Ingredients
- 3 cups all-purpose flour
- 1 cup parmesan cheese, freshly grated
- 3 cloves garlic, minced (or equivalent garlic powder)
- 1 tsp salt
- 2 tsp yeast (instant preferred)
- 1.5 cups water (adjust as needed)
Instructions
- In a large bowl, combine flour, salt, and grated parmesan. Stir in garlic and sprinkle yeast on top.
- Gradually add water while stirring until a sticky, shaggy dough forms.
- Cover with a kitchen towel and let rise at room temperature for 12–18 hours.
- Turn dough out onto a floured surface, shape into a ball, and rest for 30 minutes.
- Place a Dutch oven (with lid) in the oven and preheat to 450°F (230°C).
- Carefully place dough in the hot Dutch oven, cover, and bake for 30–45 minutes until deeply golden.
- Remove and cool on a wire rack for at least 15–20 minutes before slicing.
- Optional: brush with olive oil before serving.
Leave a Reply